Now I had the surfaces picked, I then went about cutting the sheets into 10 x 10 squares. I went for the most interesting area on the surface to cut the squares out of.

Now that I had my surface squares I then went about searching for yarn to stitch with. As well as sourcing a variety of needles to stitch with.

Sample 1- I began by framing a part of the image to isolate an interesting section, to help me focus my stitches on a particular area. I then chose to use the square of baking paper with holes, wool used but divided down. Crossed in varying sizes, tried with thicker strands but were not as aesthetically pleasing. Reflecting on the piece I feel that the piece is a bit flat and could have been added to. I could have added other stitches or perhaps adding an additional yarn to the piece would add some more interest to it.


I thought the back could show some more interest, but this had no extra interest. It was a good starting point to work from on how I could develop the other samples.

Sample 2- Folded tracing paper, variety of yarn different thicknesses. Using the image of the bag texture created with an orange netted bag. Using the square frame, I focused on a small section of the image for inspiration.
Not only did I use varying thicknesses of yarn, I used varying stitch length stiches. Placing the stitched in a diagonal fashion, in a somewhat random pattern and then crossing over in the opposite direction. Using either a running stitch or stem stitch to create the lines.
There was one disadvantage to using tracing paper, its fragility. I found it worked better with a larger needle than with the smaller needle that tended to tear. This made the paper tear when the yarn was pulled through making the hole larger.
All the stitches on the tracing paper sample changed the feel of paper it went from fragile to more ridged.


back of sample
Sample 3- My next sample was focused on the brown card with the burnt holes in. I wanted to do an eyelet stitch around the holes, the different angles and size reflecting the flower image well. I then sourced yarn; I found some parcel string I had dyed with red onion skins. I had tested natural dyes in another project. This worked well to make the petals of the flowers. And then added green toned textured yard using a basic running stitch overlapping the stitch to create a solid stem.
As the I was working with a stiffer surface it meant that the surface did not rip as easily. The only downside was that as it was so firm there was limited flexibility in the material


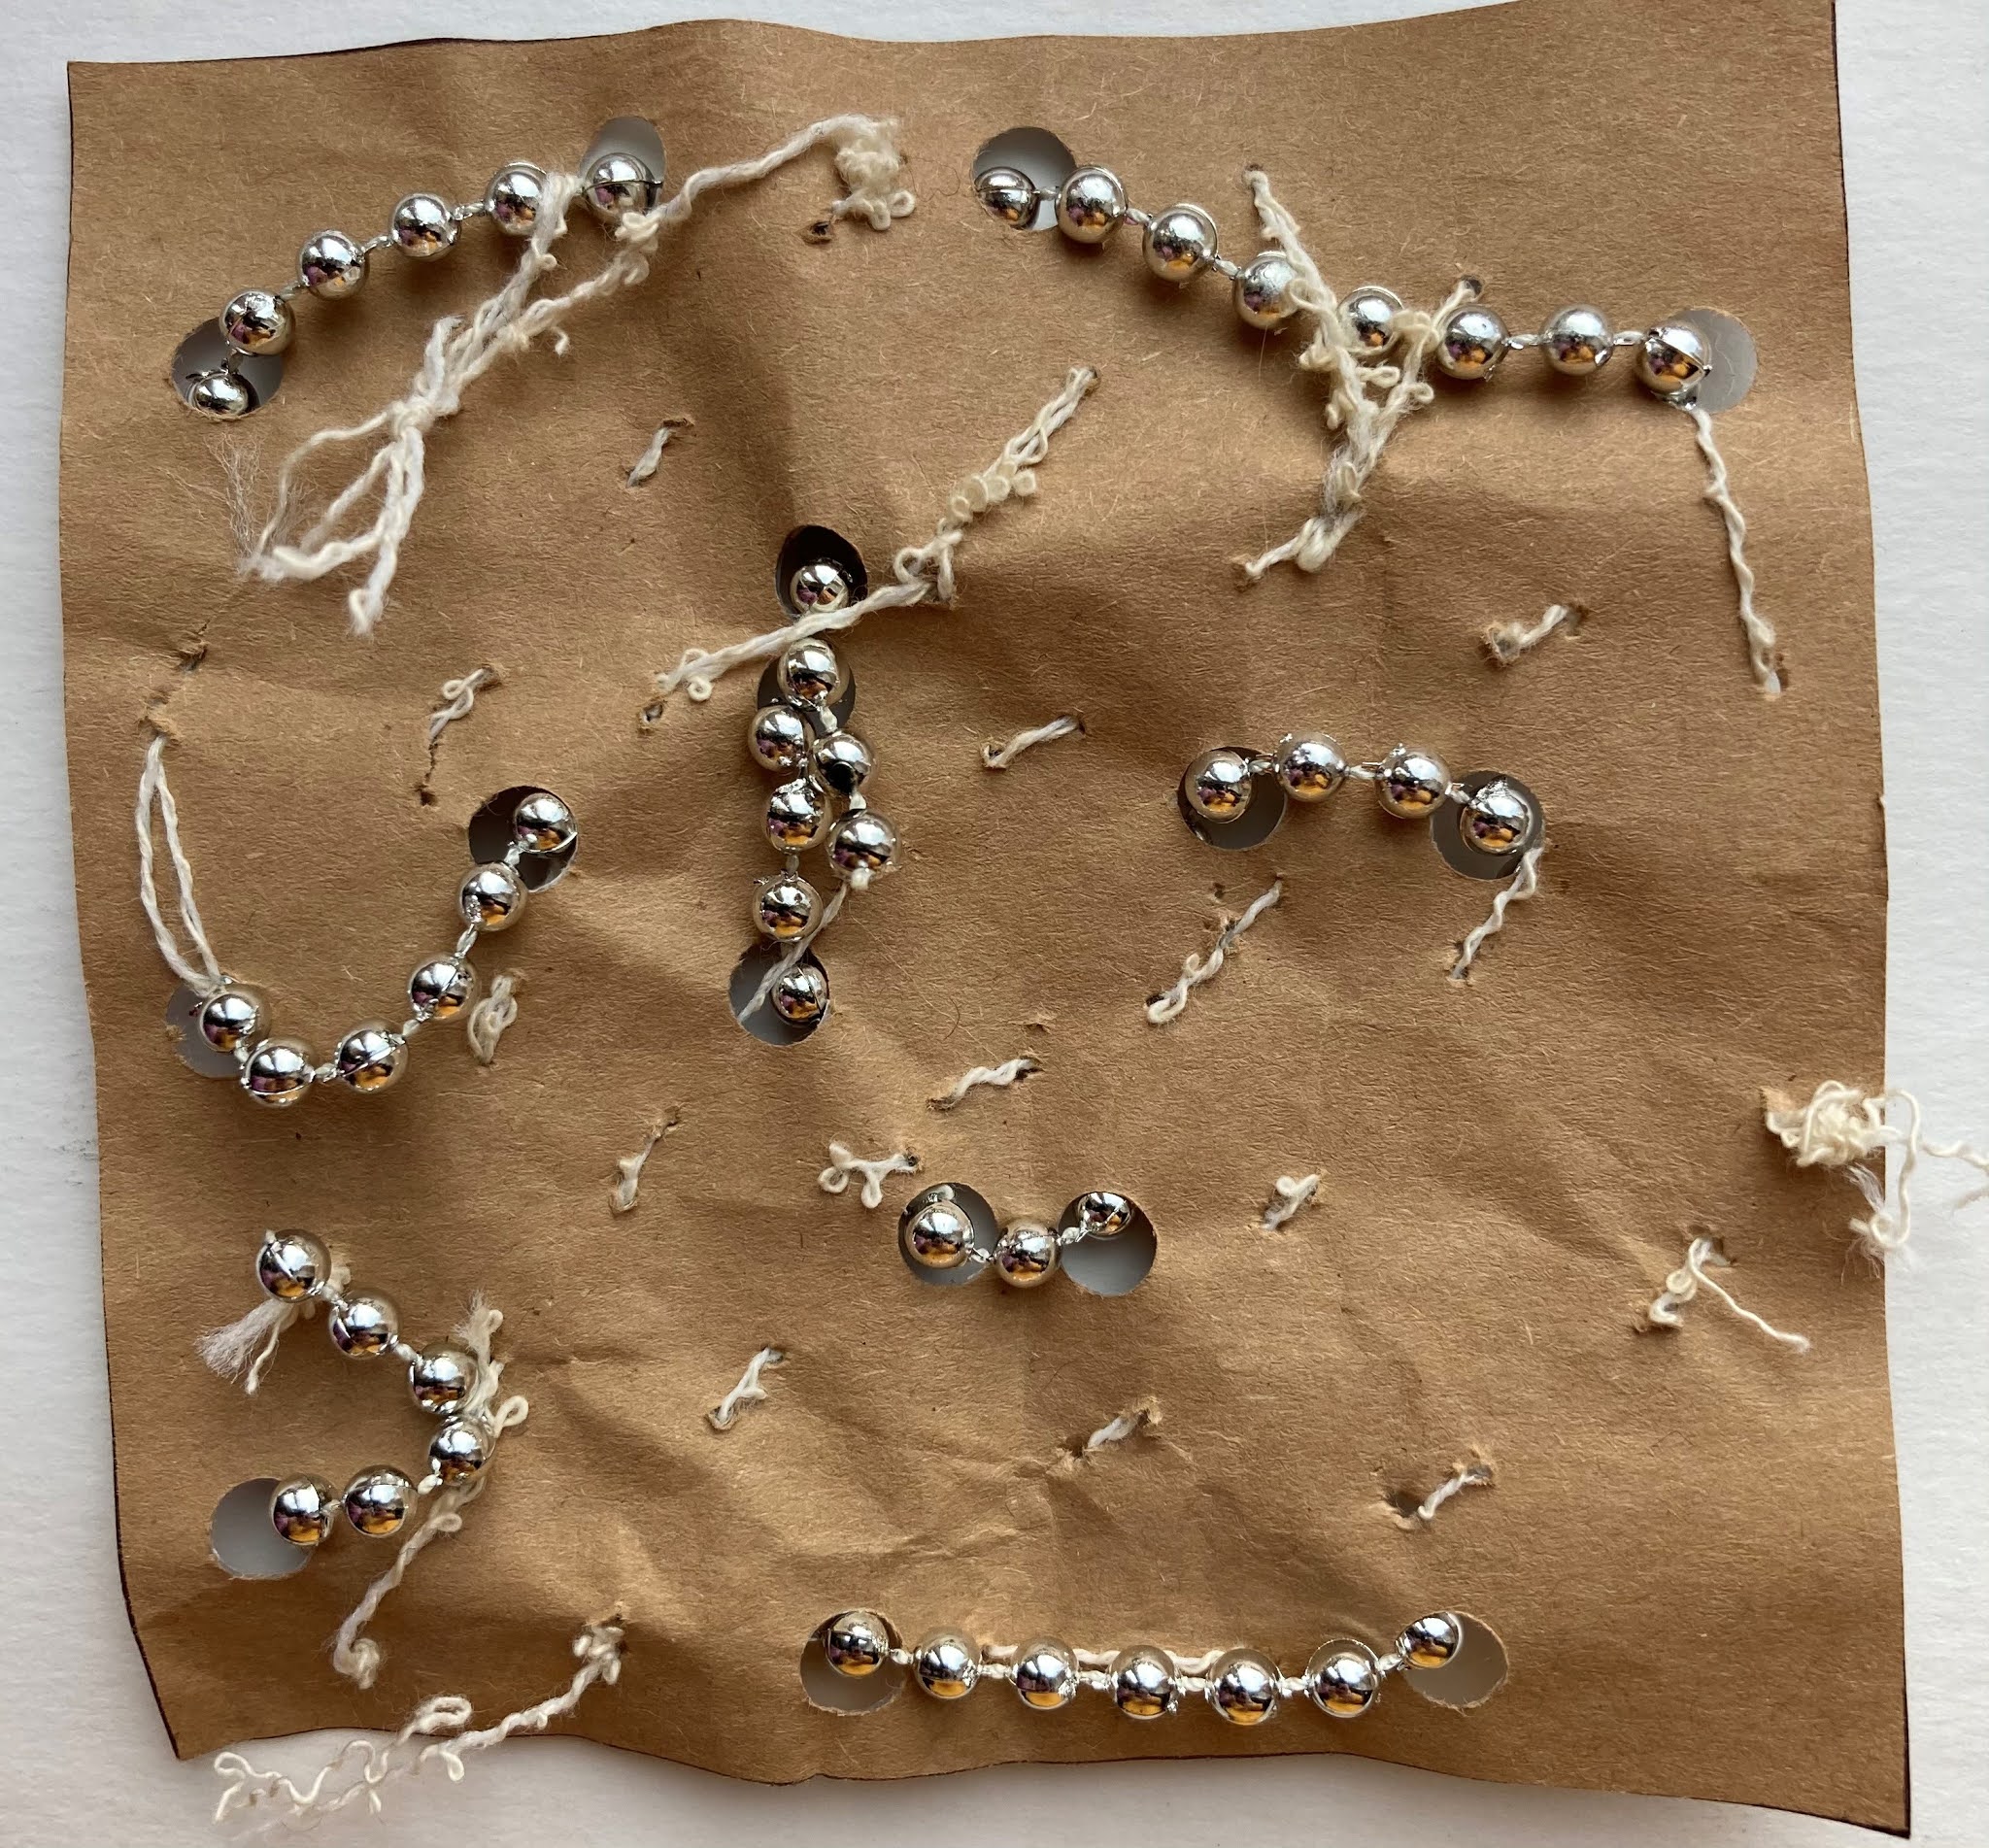
Sample 4- I wanted to work with something some unconventional yarn. In my selection of yarn, I had some silver beading. I felt inspired by the beads, they reminded me of the transparent beads on my archive piece. I then had to find a surface that would work well with the beads. Looking over my selection of papers, the paper that stood out the most was the layered tracing paper with the punched holes. As I was unable to use a thread to pull the beads through, I used a holepunch to create holes. Adding to the already punched holes and weaved the beads through the holes. Then stepping away and reflecting, I felt it needed more detail added to it. I found finer, Aran Worsted yarn, sewing the yarn across the page and using it to hold the beads more firmly. Visually this sample resembled the original image well, and I thought the final piece achieved my objective.


Sample 5- Looking at the softer lines of the dress image, I found various yarns, with soft edges to replicate the bleeding edges of the watered ink on the paper. I chose a bulky yarn for weaving, a fringed yarn, and two caterpillar style yarns in different sizes. For the background I chose the rust crumpled paper it reminded me of the creases in the dress in the when it was laid on the floor.
Attaching the yarns diagonally across the sample, reducing in size. Using small hidden stitches to hold the yarns in place. I was not happy with the bulky yarn, so I began teasing the yarn out. This added a softer edge to the yarn.


Sample 6- After using and conventional yarn in my previous sample, I wanted to carry on with that theme. I had chosen to work with the prepared cardboard which had scratch mark on it. I had wanted to try and incorporate copper wire I had sourced when selecting the yarns to use at the beginning. As the corrugated card was a stiffer and firmer material to work with I had to pierce the hole with a needle first before threading through the wire. I went for a repeat pattern of the scratch marks to resemble the knitted marks on the archive image. I felt this added to the surface creating more texture and visually adding more dimension to the sample.


Sample 7- I had a concept I wanted to try after reviewing my selected archive images. Observing the bag image it had darker areas to resemble the beading texture, I thought this could be replicated well with a cluster of French knots. Using the heated tracing paper sample that already had similar marks which had been created by the heat, I wanted to utilise these areas and add to them. One thing I had not factor in was that although the paper worked well aesthetically, practically it was a nightmare. Pushing the needle back through to create the French knot was either making the hole bigger, causing the knot to fall through or ripping the paper altogether. Once I had managed to secure one knot it made for a good base to add additional knots onto. Creating knots in an ununiform way added to the character of the piece. Although it was difficult to create the clustered knots, when they did work I felt they created the concept I had.


The next set of samples I wanted to move away from hand stitches and try using the sewing machine, to see which different effects could be achieved.
Sample 8- Taking a section of one of my archive images, focussing on straight lines to begin with. I took my sample a acetate with the fruit netting captured inside and began using the machine to sew diagonal lines across to the sample in alternate directions. I was unsure how the machine would react with the plastic, it worked better than I expected and moved easily through the machine. I did however feel that the machine stitch on its own was lost as it was so fine. Reflected back on the section of the image I had chosen to study, I decided to add thicker stitch lines using black wool. Using the wool between the smaller sewn lines, completed the look of I was hope to achieve on this sample.


Sample 9- I wanted to move onto machine embroidery. I knew I wanted to focus on the strokes I had used to create the petals of the flowers. I chose the paper I had made that represented the petals of the flowers as a base. Using the needle of the machine like I had the leaf running it at an angle creating brush strokes with the thread. And then layering up the petals with an orange thread to highlight an area of the petal. I enjoyed creating this sample and using the sewing machine like you would a paintbrush. The only problem I came across which was the tension when using the machine embroidery and paper, once I had managed to get the correct setting it was very simple to make.


Sample 10- This piece I had the intention of using machine embroidery again, making the swirling pattern from one of my archive drawings. I had planned to do this design on the paper I had manipulated with beads. I tried several attempts of machine embroider but I could not get the paper to run through the machine without the stitch either pulling the paper, creating holes or the stitches being too loose.


I did not want to leave my sample as it was as it did not look finished. I decided to add in more hand stitches in the same pattern as the machine stitch. Although the sample did not work as I had hoped, it was definitely good for me to learn and adapt to change during the process.
One thing I noted about working with paper was it limited the stitches I could use due to the fragility of the paper. Creating holes to close to each other made the paper tear, handling the paper to much also made the paper rip or crease. Using paper was definitely a good starting platform, but I can not wait to move onto fabric and allow myself to be more adventurous with stitches and not be so limited to due to the nature of the surface.
Exercise 2.4 Developed and Composed Samples
I first began with a different outlook for exercise 2.4. I had
thought I wanted to follow along the lines of the beads and whole punched paper.
Due to a limited access to shops I struggled to source the beads. This gave me
time to revaluate my design ideas, I realised how limiting the surface would
be. I felt I was limited on how to develop the surface further. I then pulled out
my surface library again.
I was drawn to the surface I had created with the cellophane
as I felt I had lots of areas to develop further. I began by developing my
ideas in my sketchbook.

I wanted to see how the stitches would look sandwiched between the cellophane sheets. I began by sampling different stitches into one layer of the cellophane. I created two different widths of stitches to see which worked best in with this technique. I then added the additional layer of cellophane to the stitched layer and heated the cellophane with an iron.
The first problem I came across was that the iron was to hot and lead to the image below happening.

Although I loved the effect that the heat had on the cellophane and it left an interesting surface that would be something to develop for another project. For now this is not what I was looking to achieve, so I began redoing the stitches. This time I used a lower temperature on the iron and this time I didn't melt all the cellophane losing the stitches. These stitches are in the image below on the right, the image on the left shows the different effect by sewing through both layers.

Sewing through one layer cellophane made it more fragile, as opposed to two heated layers that made the surface firmer and easier to stitch through. The layer of cellophane over the stitches meant that the surface became smooth rather than the raised stitches. It also meant that the stitches moved as the cellophane was heated up. Creating for an interesting and unpredictable effect.
Now I had my stitches decided, I knew I wanted to incorporate the fruit netting again as this worked well in the initial sample. The fruit netting was not a desirable colour for this piece. So I began to sample what could be achieved with acrylic paint on the netting. Looking back I could have tried other materials.
The black paint worked better over the netting creating a better coverage of the orange netting. Now I had decided on the materials and techniques I began sewing diagonal lines on the machine first, all in black thread. Then sewing medium width lines with embroidery threads and then the thicker line using black wool. Using varying sizes of needles, creating the lines on first layer with lines going in both directions.
I then began laying the piece of fruit netting I had painted black and lay them spaced out on top of the first layer. I then carefully used the heat from an iron to bond the two layers together. I liked the way the cellophane reacted with the heat causing it to constrict and wrinkle. The heat also caused the fruit netting to react, causing it shrink and split.
Once I had fully bonded the two layers of cellophane together. I then began sewing the lines on the double layer of cellophane. This was a lot easier to stitch into as the heat and the additional layer made the cellophane less fragile.


Once all the lines were completed, I was deciding if I should leave the loose ends or if I should trim them off. I prefer the freer, loose strands framing the stitched piece.


After I took few moments to reflect on my progress, I felt I the piece had not been developed far enough. So I went back to look over my surface library and found my other surface created from tracing paper. It inspired me, it reminded me of the lines on the beaded bag which is what I was hoping to capture the beads with the French knots.


No comments:
Post a Comment