Exercise 1.3 Making marks
I began by starting to think about the different marks that
could be made with the different mediums. The mediums I have chosen to work
with were pen and ink.
Using two different types of pen to create different
effects. A fine liner to create more intricate marks on the page. Whereas with
the thicker pen they created broader, simplified strokes. I produced a
selection of marks created with loops, hatching, dots and lines. Creating shade
by making more marks either on top or closer together.


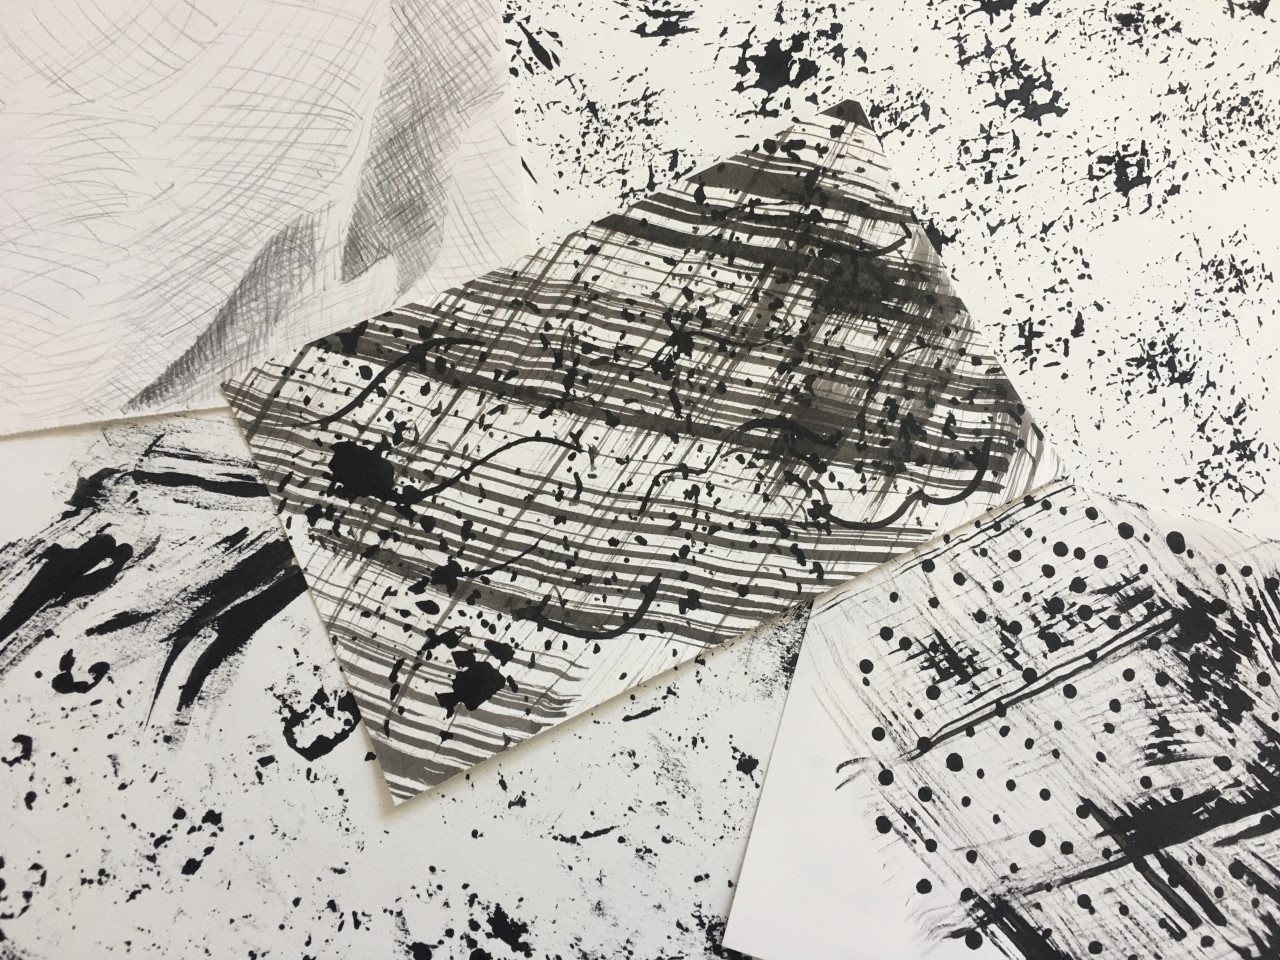
I became a lot more experimental when it came to using the
ink, I spent some time sourcing items I thought would create interesting marks
on the page, as well as looking for items that should qualities that could
transferred to marks that resembled the marks on the archive items. Choosing
items such as, string, sponge, toothbrush and a pinecone. The marks that were
made were freer and unpredictable. Out of all three of the sheets I felt that
this sheet was the most interesting because the marks were less uniform and I enjoyed
creating the interesting marks with unusual items.


Before I began with the exercise of capturing my archive
items with different marks, I sat and did some mind mapping to think about the
different qualities each item had and the best ways to depict them in marks.

The first image I captured was the beaded bag using quick,
rough, scratchy marks using a biro. Although the piece was aesthetically
pleasing, but it did not capture the essence of mark making it felt to finished
and polished. It did give me a base point to work from. As it made me look at
the items texture and made me think about how I could recreate the texture in
marks.

I then went on to experiment with different ways to capture
the texture of the bag. Using pencil to create the lining of the bag, doing
heavier cross hatching to create the shade of the fabric. Again I didn’t really
feel that the essence and feel of the bag was captured within this piece.
My next batch of work saw me branch out into more
experimental tools, using pinecones, cut cardboard, netting, sponge and grass.
I created this collection of images, looking at the stitching and beading in
more detail and capturing that in more animated and more interesting to look
at. This type of mark making I find a lot more interesting due to the textured,
freer marks that are created with the unconventional tools. Due to the nature
of the tools it meant I need to work with fluid medium, I choose to use ink and
gouache to work with.


Next I wanted to experiment with some of the artists that
use mark making in their work. The first artist I looked at was Cy Twombly
work, although he worked with bold colours, I was still keen to work in his
style. Using bold, quick movements, create the archive items in a basic form using
heavier paint to create some basic detail in the piece.


https://www.nytimes.com/2011/07/07/arts/design/cy-twombly-an-art-who-emphasized-mark-making.html
The next archive item I wanted to focus on was the dress this item had less detail to focus on, so it took a lot of observations to find areas to capture in marks. I continued on the theme of Cy Twombly to capture the drapes of the dress. It wasn’t as successful as I had hoped as the proportions are out and the dress looks shorted than it should be.

My next set of observations were focused on the interesting details
and angled lines on the sleeve of the dress. Looking at different methods and
tools to capture observations.


I then wanted to develop this method further using watercolour paper which I had added water before using the same combs as before and dragging the ink across the page this created an really appealing effect with the ink bleeding across the page.

I continued on with my experimental approach using a feather
as tool to apply whispery delicate lines to capture the delicate drapes with in
the fabric.

Another part of the dress that interested me was the zip, I thought
the way the zip teeth joined together would be interesting to recreate in
marks. And of course, it needed an interesting tool to create the marks. This
time I chose to use a fork as I thought the prongs on the fork would create interesting
marks that would resemble the teeth of the zip. As the zip was made up of an repetitive
pattern it was easy to recreate with fork.

My final piece of the dress but I wanted to capture some of
the movement in the dress, I asked my daughter to hold the dress up and move it
from side to side whilst I sketched the movement in oil pastels. I was inspired
by the artist Dan Dressler and his sketches of movement. How simple lines convey
movement. Although my piece was not as successful I do like the soft sweeping
lines portray the hang in the dress.
 https://www.dandressler.com/visual-art-projects/gesture-drawing-times-drawing-movement-drawing
The last archive item I focused on was the khaki jumper that
belonged to my grandmother. There were lots of interesting marks and patterns
to work with. The knit had interesting lines with in it and the different types
of knit in the collar and the cuffs.

The first piece I looked out the way the fabric laid and the
creases and the basic marks the cuffs and collar created. Using this as a starting
point for this series of work. I took a black felt tip pen and quickly moved across the page sketching the jumper.

One of the final artists I had come across on my mark making
research was Van Gogh, I was familiar with is painting work such as A Starry
Night and Sunflowers. But I was unaware of his sketch work which was created in
complete marks. I felt that this style of mark making would work well with the
marks within the jumper.

https://en.wikipedia.org/wiki/Sunflowers_(Van_Gogh_series)

https://www.britannica.com/biography/Vincent-van-Gogh

I tried to recreate similar marks to the marks Van Gogh used when producing the jumper. I felt that fine liner using a 0.8 nib would be the best medium to use. This was one of my successful sketches, the repetition in the marks makes a stark contrast on the plain background. They also help to depict the texture within the knit of the jumper, collar and cuffs.

My final piece for this collection of mark-making work, I wanted to finish with another experimental tool. Looking and the material closely and seeing all the fibres entwined together. I then saw a lolly stick my daughter had been using for an art project and I remembered snapping lolly sticks when I’d finished and the sharp edges that were revealed. These would hopefully make the desired marks I was looking for.

The splintered edges of the of the broken lolly stick, worked well when the correct amount of medium was applied. I chose to use gouache paint with this piece apposed to ink as I felt the gouache would be held better on the tool and easier to work with. The correct amount of medium was difficult to manage as I wanted to get an even coverage on the whole tool, but as the tool had an uneven edge some parts received more medium than others. This is visible in the in the image with heavier marks. With the heavier marks it took away from the frayed edge look I was hoping to achieve.
After spending some time observing the collar, I wanted to investigate other ways to capture the collar. As the last sketch had been very rigid, I wanted to try the opposite of the rigid line and try and achieve a softer line. I went for a softer tool and choose a feather and the more fluid medium of ink. The feather provided minimal control creating whispery soft lines.

I wondered if I could push
the boundaries even further with even less control so, I decided I’d remove
some hair from one of my daughters pony toys and try to create lines with it. The
lines were very unpredictable leaving thick heavy lines of light delicate line.
With the heavier lines these were created by holding the hair closer to the end
with a firmer grip. To produce the more whispery lines I held the hair further
up and with a loser grip which gave me very little control of the lines created
or even the direction the travelled in. I merely had minimal guidance to the
rough outline I was hoping to achieve. I enjoyed the unpredictive nature of
this tool and the gentle lines that could be created.

No comments:
Post a Comment